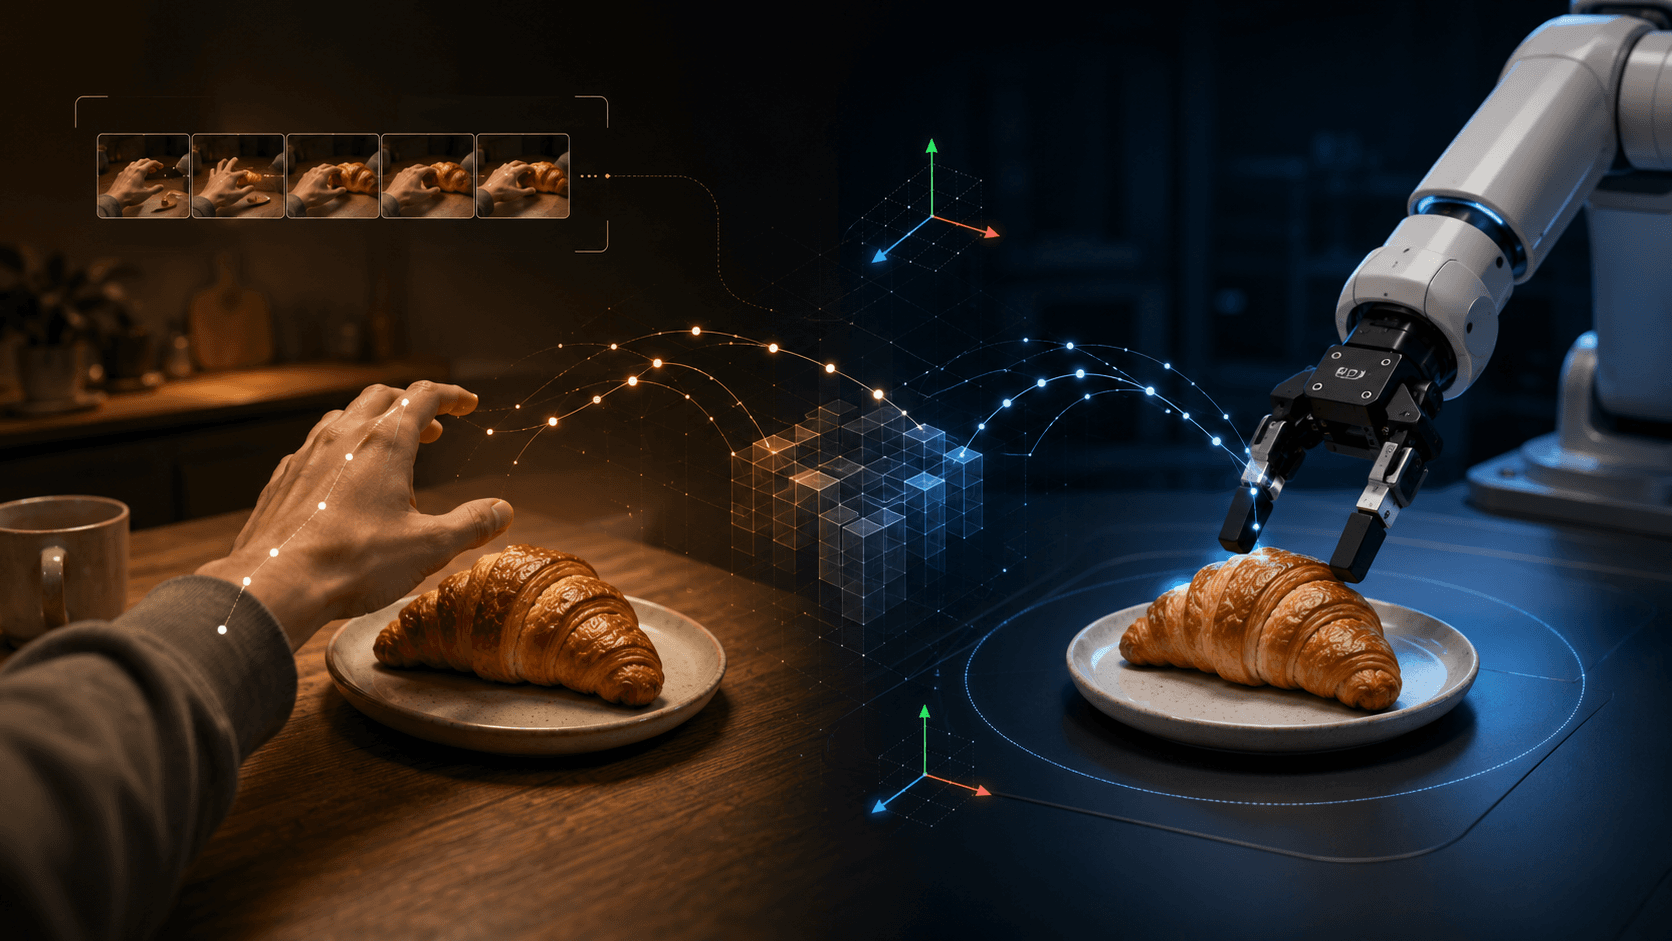
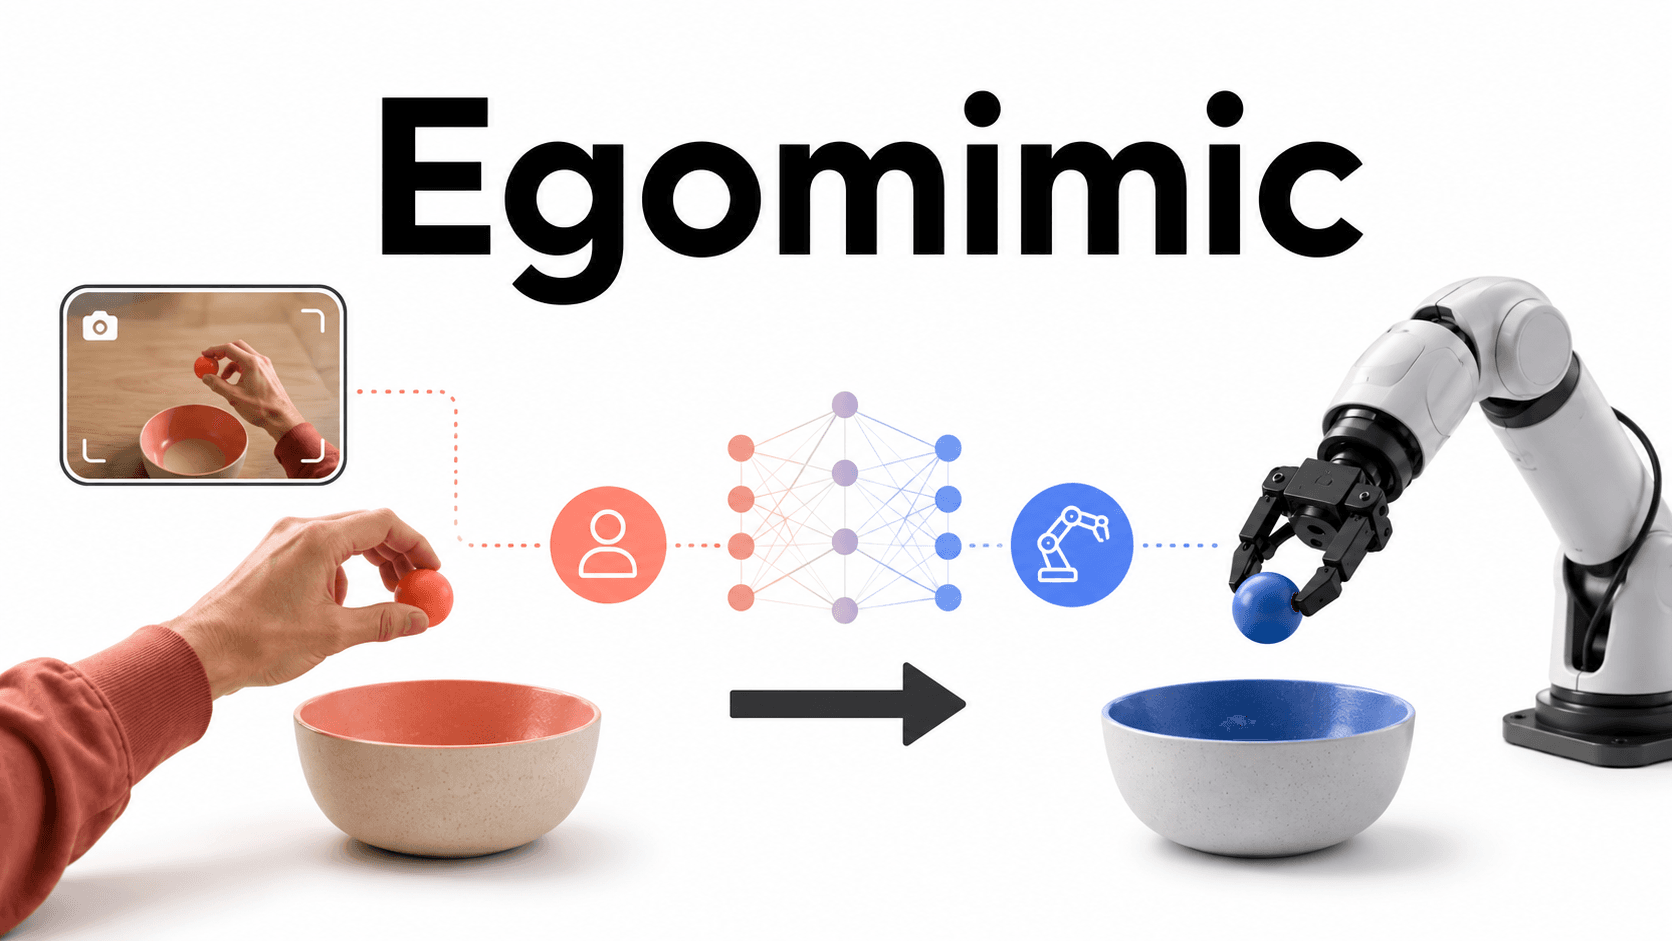
Understanding EgoMimic by Running It: How First-Person Human Videos Can Help Robot Imitation Learning
A hands-on walkthrough of EgoMimic, from dataset setup to training and result visualization.
1. What is EgoMimic?
EgoMimic is a method for using first-person human videos and 3D hand trajectories as data for robot imitation learning.
In many previous approaches that use human videos, the human video is often used only to extract high-level intent: where the robot should move next, which object it should touch, or what subgoal it should aim for. That high-level information is then passed to a separate robot policy.
EgoMimic takes a different approach. It treats human data not just as auxiliary information, but as something closer to an embodied demonstration, similar in spirit to robot demonstrations.
Human:
  Aria image + 3D hand trajectory
        ↓
  Converted into a format useful for robot learning
        ↓
  Trained together with robot data

Robot:
  Aria image + wrist image + joint action
        ↓
  Learn an executable robot policy
EgoMimic is a full-stack framework that combines several pieces:
human data collection with Meta's Project Aria,
Aria and wrist cameras on the robot side,
cross-domain alignment between humans and robots,
and a policy architecture for co-training on human and robot demonstrations.
The paper describes four major components: Project Aria, a low-cost bimanual robot setup, cross-domain alignment, and a human/robot co-training architecture.

Credit: https://egomimic.github.io/
Sensor setup: Human Aria, Robot Aria, and wrist cameras
EgoMimic uses Project Aria on both the human side and the robot side to make their viewpoints as similar as possible.
On the human side, the operator wears Project Aria. Aria's forward-facing RGB camera is used as the first-person image. The side SLAM cameras are used for device pose estimation and hand tracking.
The robot also carries Project Aria. This is one of the interesting design choices in EgoMimic. The robot's “head” image is not captured by a custom robot-only camera. Instead, the image comes from a Project Aria device mounted on the upper body of the robot. This reduces the camera-domain gap between human Aria images and robot images. In addition, the robot has Intel RealSense D405 wrist cameras so that the policy can see the manipulation area in more detail.
| Data source | Sensor | Role |
|---|---|---|
| Human Aria | Project Aria worn by a human | First-person RGB, SLAM, and hand tracking |
| Robot Aria | Project Aria mounted on the upper body of the robot | Robot first-person view close to the human viewpoint |
| Robot Wrist Camera | RealSense D405 on the robot wrist | Local view for fine manipulation |


How human data and robot data differ
EgoMimic trains on human and robot data together. However, the two data types are not identical.
Human data contains first-person images, 3D hand poses, and future hand trajectories. Robot data contains first-person images, wrist-camera images, end-effector poses, joint positions, and joint actions.
| Item | Human data | Robot data |
|---|---|---|
| Images | Aria egocentric RGB | Robot Aria RGB + wrist views |
| State | 3D hand pose | End-effector pose + joint positions |
| Action | Future hand pose trajectory | Future end-effector pose + joint action |
| Gripper action | Not directly available | Included in joint action |
| Role in training | Teaches how the hand pose moves | Teaches executable robot joint actions |
The key point is that human data does not contain robot joint actions.
From human Aria data, we can obtain the position and trajectory of the human hand. But from human data alone, we cannot directly learn how to move the robot's shoulder, elbow, wrist, or gripper.
EgoMimic handles this by using hand/end-effector pose prediction as a shared bridge between humans and robots. The robot-executable joint actions are still learned from robot demonstrations.
The three gaps EgoMimic tries to close
Simply mixing human data and robot data is not enough. EgoMimic mainly addresses three kinds of human-robot gaps:
1. Coordinate-frame gap
2. Action-distribution gap
3. Visual-appearance gap
The paper also describes the human-robot gap in terms of action coordinate frames, action distributions, and visual appearance.
1. Coordinate-frame gap
A human wears Aria on the head, so the camera moves during the task. When the person reaches out, looks around, or changes posture, the camera coordinate frame changes over time.
If we use future hand positions as they are, each future point may belong to a different camera coordinate frame. That is an awkward representation for the model.
EgoMimic uses the Aria pose estimated by SLAM to transform the future hand trajectory into the current camera coordinate frame. This allows the model to predict future hand motion relative to the image it is seeing now.

2. Action-distribution gap
The movement distribution of a human hand and that of a robot end-effector are different, even for the same task.
For example, a human arm has flexible shoulder and elbow motion. A robot arm, on the other hand, is constrained by its mounting position and joint limits. As a result, even when both are reaching for the same object, the center and scale of their end-effector coordinates can be different.
If we mix these distributions directly, the model may simply learn separate patterns such as “this is the human distribution” and “this is the robot distribution.”
To reduce this issue, EgoMimic applies Z-score normalization separately for the human and robot domains.
x_norm = (x - mean) / std
In other words, for each data source, EgoMimic subtracts the mean and divides by the standard deviation.
3. Visual-appearance gap
Human hands and robot arms look very different. Human images may contain skin and sleeves, while robot images show metal or plastic arms.
If the model is trained directly on raw images, it may separate human and robot data based on appearance rather than focusing on task-relevant motion.
EgoMimic addresses this by using SAM/SAM2 to mask the human hand or robot arm, and then overlaying a red line.
The mask reduces appearance differences such as skin, sleeves, and robot hardware. The red line keeps useful directional information about the hand or arm.
EgoMimic is ACT-based action chunking, not Flow Matching
EgoMimic uses ACT, or Action Chunking Transformer, as its policy backbone.
Given the current image and state, the model predicts a chunk of future actions. In this setup, the chunk contains 100 future points. For robot data, EgoMimic learns future end-effector pose actions and joint actions. For human data, it learns future hand pose actions.

2. What this post tries to check
In this post, I am not trying to fully reproduce the paper results. Instead, I want to check the core mechanics of EgoMimic on my own machine.
Specifically, I will look at the following:
| What I try | Purpose |
|---|---|
| Open the public HDF5 data | Check how human and robot data are stored |
| Extract images | Inspect Aria images, wrist images, masked images, and line images |
| Visualize action distributions | Understand the human/robot distribution gap and normalization |
| Debug-run EgoMimic itself | Check the training loop that reads human and robot HDF5 files together |
| Look at validation videos | Understand how the offline visualization should be interpreted |
3. Public HDF5 data
EgoMimic's public data is stored in HDF5 format. HDF5 is a data format that can store a folder-like hierarchy inside a single file. It can contain images, joint states, actions, train/validation splits, and other arrays in one .hdf5 file.
HDF5 mainly consists of three concepts:
| Term | Meaning |
|---|---|
| Group | Similar to a folder |
| Dataset | The actual data, similar to a NumPy array |
| Attribute | Metadata attached to a group or dataset |
At a high level, EgoMimic's HDF5 structure looks like this:
bowlplace_robot.hdf5
├── data
│   ├── demo_0
│   │   ├── obs
│   │   │   ├── front_img_1
│   │   │   ├── front_img_1_line
│   │   │   ├── front_img_1_masked
│   │   │   ├── right_wrist_img
│   │   │   ├── joint_positions
│   │   │   └── ee_pose
│   │   ├── actions_joints_act
│   │   └── actions_xyz_act
│   └── ...
└── mask
    ├── train
    ├── valid
    ├── demo_train
    └── demo_valid
Under data, each demo stores images, states, and actions. Under mask, the file stores lists of which demos should be used for training and which demos should be used for validation.
Inspecting the HDF5 contents
The following script prints the HDF5 structure, dataset shapes, and dtypes.
#!/usr/bin/env python3

import argparse
from pathlib import Path

import h5py


def print_hdf5_tree(path: Path, max_items: int = 120):
    """Print dataset paths, shapes, and dtypes in an HDF5 file."""
    count = 0

    with h5py.File(path, "r") as f:
        print("Top-level keys:", list(f.keys()))

        def visitor(name, obj):
            nonlocal count
            if count >= max_items:
                return
            if isinstance(obj, h5py.Dataset):
                print(f"{name:60s} shape={obj.shape} dtype={obj.dtype}")
                count += 1

        f.visititems(visitor)


def main():
    parser = argparse.ArgumentParser()
    parser.add_argument("--dataset", required=True, type=Path)
    parser.add_argument("--max-items", type=int, default=120)
    args = parser.parse_args()

    print_hdf5_tree(args.dataset, args.max_items)


if __name__ == "__main__":
    main()
Example commands:
python tools/print_hdf5_tree.py \
  --dataset datasets/bowlplace_robot.hdf5 \
  --max-items 80

python tools/print_hdf5_tree.py \
  --dataset datasets/bowlplace_human.hdf5 \
  --max-items 80
In my Bowlplace check, the robot HDF5 was 41.29 GB. It had four top-level demo groups, and each demo had 3,000 samples. That gives 12,000 timesteps in total, which is about 4 minutes at 50 Hz.
The human HDF5 was 37.85 GB. It had 50 top-level demo groups and 14,685 timesteps in total, which is about 8.16 minutes at 30 Hz.
| File | Size | Top-level demo groups | Timesteps | Approx. duration |
|---|---|---|---|---|
bowlplace_robot.hdf5 |
41.29 GB | 4 | 12,000 | About 4.00 min |
bowlplace_human.hdf5 |
37.85 GB | 50 | 14,685 | About 8.16 min |
Extracting images from HDF5
Next, I extracted actual images from the HDF5 files.
For the robot data, the following image keys are useful to inspect:
obs/front_img_1
obs/front_img_1_masked
obs/front_img_1_line
obs/right_wrist_img
For the human data, I used these keys:
obs/front_img_1
obs/front_img_1_masked
obs/front_img_1_line
Here is a small script that saves one image from a specified demo and frame index.
#!/usr/bin/env python3

import argparse
from pathlib import Path

import h5py
from PIL import Image


def save_image(hdf5_path: Path, demo: str, key: str, index: int, output: Path):
    """Save one image frame from an HDF5 dataset."""
    with h5py.File(hdf5_path, "r") as f:
        dataset_path = f"data/{demo}/{key}"
        if dataset_path not in f:
            raise KeyError(f"Dataset not found: {dataset_path}")

        image = f[dataset_path][index]

    output.parent.mkdir(parents=True, exist_ok=True)
    Image.fromarray(image).save(output)
    print(f"Saved: {output}")


def main():
    parser = argparse.ArgumentParser()
    parser.add_argument("--dataset", required=True, type=Path)
    parser.add_argument("--demo", required=True)
    parser.add_argument("--key", required=True)
    parser.add_argument("--index", type=int, default=0)
    parser.add_argument("--output", required=True, type=Path)
    args = parser.parse_args()

    save_image(args.dataset, args.demo, args.key, args.index, args.output)


if __name__ == "__main__":
    main()
Example commands:
python tools/save_hdf5_image.py \
  --dataset datasets/bowlplace_robot.hdf5 \
  --demo demo_0 \
  --key obs/front_img_1 \
  --index 0 \
  --output blog_outputs/robot_front_raw.png

python tools/save_hdf5_image.py \
  --dataset datasets/bowlplace_robot.hdf5 \
  --demo demo_0 \
  --key obs/front_img_1_line \
  --index 0 \
  --output blog_outputs/robot_front_line.png

python tools/save_hdf5_image.py \
  --dataset datasets/bowlplace_robot.hdf5 \
  --demo demo_0 \
  --key obs/right_wrist_img \
  --index 0 \
  --output blog_outputs/robot_right_wrist.png

python tools/save_hdf5_image.py \
  --dataset datasets/bowlplace_human.hdf5 \
  --demo demo_0 \
  --key obs/front_img_1_line \
  --index 0 \
  --output blog_outputs/human_front_line.png


4. Visualizing action distributions and normalization
After checking the images, I looked at the actions.
EgoMimic does not only predict the next single action step. Instead, it handles multiple future action steps together. This is called an action chunk.
For example, in my HDF5 file, the robot-side actions_joints_act had this shape:
actions_joints_act: (3000, 100, 7)
This means:
For each of 3,000 timesteps,
the dataset stores 100 future points,
and each future point has a 7-dimensional joint action.
Similarly, the pose action actions_xyz_act had this shape:
actions_xyz_act: (3000, 100, 3)
This represents 100 future points of 3D pose action. In my HDF5 inspection, the robot-side actions_joints_act was (3000, 100, 7), and actions_xyz_act was (3000, 100, 3). The human-side actions_xyz_act was also stored in shapes such as (300, 100, 3) for each demo.
Plotting the action distribution
Here, I extracted actions_xyz_act from both the human and robot HDF5 files, and compared dim=1. In many coordinate conventions, dim=1 is the y direction, so it is useful to think of it as the left-right component.
#!/usr/bin/env python3

import argparse
from pathlib import Path

import h5py
import numpy as np
import matplotlib.pyplot as plt


def collect_action_values(hdf5_path: Path, key: str, max_rows: int):
    """Collect action values from all demos in an HDF5 file."""
    values = []

    with h5py.File(hdf5_path, "r") as f:
        for demo in f["data"].keys():
            dataset_path = f"data/{demo}/{key}"
            if dataset_path not in f:
                continue

            arr = f[dataset_path][()]
            arr = arr.reshape(-1, arr.shape[-1])
            values.append(arr)

    if not values:
        raise RuntimeError(f"No action data found for key: {key}")

    out = np.concatenate(values, axis=0)
    if len(out) > max_rows:
        out = out[:max_rows]
    return out


def zscore(x):
    """Apply per-dataset Z-score normalization."""
    return (x - x.mean(axis=0, keepdims=True)) / (x.std(axis=0, keepdims=True) + 1e-6)


def plot_distribution(human, robot, dim: int, title: str, output: Path):
    """Plot human and robot action distributions."""
    plt.figure()
    plt.hist(human[:, dim], bins=80, alpha=0.5, density=True, label="human")
    plt.hist(robot[:, dim], bins=80, alpha=0.5, density=True, label="robot")
    plt.xlabel(f"actions_xyz_act dim={dim}")
    plt.ylabel("density")
    plt.title(title)
    plt.legend()
    plt.tight_layout()
    output.parent.mkdir(parents=True, exist_ok=True)
    plt.savefig(output, dpi=160)
    plt.close()


def main():
    parser = argparse.ArgumentParser()
    parser.add_argument("--human", required=True, type=Path)
    parser.add_argument("--robot", required=True, type=Path)
    parser.add_argument("--dim", type=int, default=1)
    parser.add_argument("--out-dir", required=True, type=Path)
    parser.add_argument("--max-rows", type=int, default=50000)
    args = parser.parse_args()

    human = collect_action_values(args.human, "actions_xyz_act", args.max_rows)
    robot = collect_action_values(args.robot, "actions_xyz_act", args.max_rows)

    plot_distribution(
        human,
        robot,
        args.dim,
        "Before normalization",
        args.out_dir / "action_distribution_before.png",
    )

    plot_distribution(
        zscore(human),
        zscore(robot),
        args.dim,
        "After per-domain Z-score normalization",
        args.out_dir / "action_distribution_after.png",
    )


if __name__ == "__main__":
    main()
Run it like this:
python tools/plot_action_distribution.py \
  --human datasets/bowlplace_human.hdf5 \
  --robot datasets/bowlplace_robot.hdf5 \
  --dim 1 \
  --out-dir blog_outputs/action_distribution


5. Debug-running EgoMimic itself
Next, I ran a small debug training job with the EgoMimic code.
The EgoMimic training code reads the robot HDF5 and the human HDF5 at the same time.
On the robot side, it learns future joint actions and future end-effector pose actions. On the human side, it learns future hand pose actions.
The training flow looks roughly like this:
Human batch:
  front_img_1_line + ee_pose
        ↓
  shared encoder / transformer
        ↓
  future hand pose chunk
        ↓
  pose loss

Robot batch:
  front_img_1_line + right_wrist_img + joint_positions
        ↓
  shared encoder / transformer
        ↓
  future EEF pose chunk + future joint action chunk
        ↓
  pose loss + joint loss
Checking the train/validation split
In my robot HDF5 file, the original mask/train and mask/valid pointed to the same four demos. Using them as-is caused a train/validation overlap error. For debugging, I created new demo_train and demo_valid splits.
For the robot data, I used this split:
mask/demo_train: demo_0, demo_1, demo_10
mask/demo_valid: demo_11
I also created demo_train and demo_valid with the same names on the human side. EgoMimic reads both the robot and human HDF5 files, so both files need train/validation splits.
In my inspection logs, I confirmed that the robot side had three demo_train entries and one demo_valid entry, while the human side had 49 demo_train entries and one demo_valid entry.
Running EgoMimic
The command I used was:
cd EgoMimic/egomimic

python scripts/pl_train.py \
  --config configs/egomimic_oboo_demo_split.json \
  --dataset ../datasets/bowlplace_robot.hdf5 \
  --dataset_2 ../datasets/bowlplace_human.hdf5 \
  --debug \
  --no-wandb \
  --output_dir ../trained_models_blog \
  --description egomimic_demo_split_debug
The important point is that I used a config that refers to demo_train and demo_valid, instead of the original configs/egomimic_oboo.json.
The --debug flag is not meant for getting good performance. It is useful for quickly checking whether the HDF5 files can be loaded, whether the model can be initialized, whether forward/backward passes work, and whether validation videos are generated.
How to read the validation video: green, purple, and red
During training, EgoMimic outputs validation videos. These videos are not real robot rollouts. They are offline visualizations created from validation data in the HDF5 file. The video overlays the model's predicted actions and the ground-truth actions.
A useful way to interpret the colors is:
| Color | Meaning |
|---|---|
| Green | Ground-truth future action chunk stored in the HDF5 file |
| Purple | Future joint action chunk predicted by the joint-action head |
| Red | Future pose action chunk predicted by the pose head |
| Red line on the input image | The mask/line processing already included in front_img_1_line |
The green trajectory is not produced by the model. It is the ground truth. So if the green line looks like a trajectory, that means the HDF5 file contains a future ground-truth trajectory.
Purple and red are model predictions. In my debug run, purple and red looked almost like dots, with only small jittering motion. I interpret this as the predicted 100 future points collapsing into almost the same location.
So the validation video can be read like this:
Green:
  Ground-truth future trajectory.
  It appears as a line because the HDF5 file contains the future trajectory.

Purple:
  Joint action prediction.
  In this debug run, the model has not learned enough yet, so the prediction collapses into a dot-like shape.

Red:
  Pose action prediction.
  Similarly, the 100 future points do not spread out much and appear almost dot-like.


This does not mean the visualization is broken. In fact, this is a natural result for a debug run. I used the sample dataset and trained only briefly with --debug, so this setup is not expected to reproduce the performance reported in the paper.
6. What I learned, and what I did not verify
Here is what I was able to confirm in this hands-on check:
| What I confirmed |
|---|
| EgoMimic reads human HDF5 and robot HDF5 files at the same time |
| The HDF5 structure contains images, poses, and joint actions |
front_img_1_line is already processed with mask + red line |
actions_xyz_act and actions_joints_act are 100-step future action chunks |
| Per-domain normalization helps align human and robot action distributions |
| EgoMimic's debug training run works end to end |
| The validation video can be interpreted as an offline overlay of ground truth and predictions |
At the same time, this experiment was not a performance evaluation. I did not reproduce the paper's reported scores, and I did not verify whether the trained model succeeds on a real robot.
The paper reports that, on the Object-in-Bowl dataset, EgoMimic trained with 2 hours of robot data plus 1 hour of hand data outperformed ACT trained with 3 hours of robot data.
This result captures the main idea of EgoMimic well: instead of only collecting more robot data, adding first-person human hand-trajectory data may improve robot learning more efficiently.
7. Conclusion
EgoMimic is a method for using first-person human videos and 3D hand trajectories in robot imitation learning.
This debug experiment does not reproduce the paper's full performance. Still, by looking step by step at the HDF5 structure, Aria images, mask/line images, action distributions, normalization, the debug training run, and the validation video, I was able to understand what EgoMimic takes as input, what it predicts, and why human data can be mixed into robot policy learning.
For me, the most useful takeaway is that EgoMimic does not magically convert human demonstrations into robot joint actions. Instead, it creates a shared pose-prediction bridge between human hand motion and robot end-effector motion, while still using robot data to learn executable joint actions.
That design makes the method feel much more concrete: human videos provide extra embodied motion examples, and robot demonstrations teach how those motions should become robot actions.